Creating a Calculator with ES Calculator Builder #
In this guide, we will walk you through creating your first calculator using a Google Sheet as a backend. We’ll create a Car Loan Calculator that pulls data from the Google Sheet and displays the calculations on your website. You can access the sample Google Sheet here: Car Loan Calculator Spreadsheet.
Step 1: Set Up Your Google Sheet #
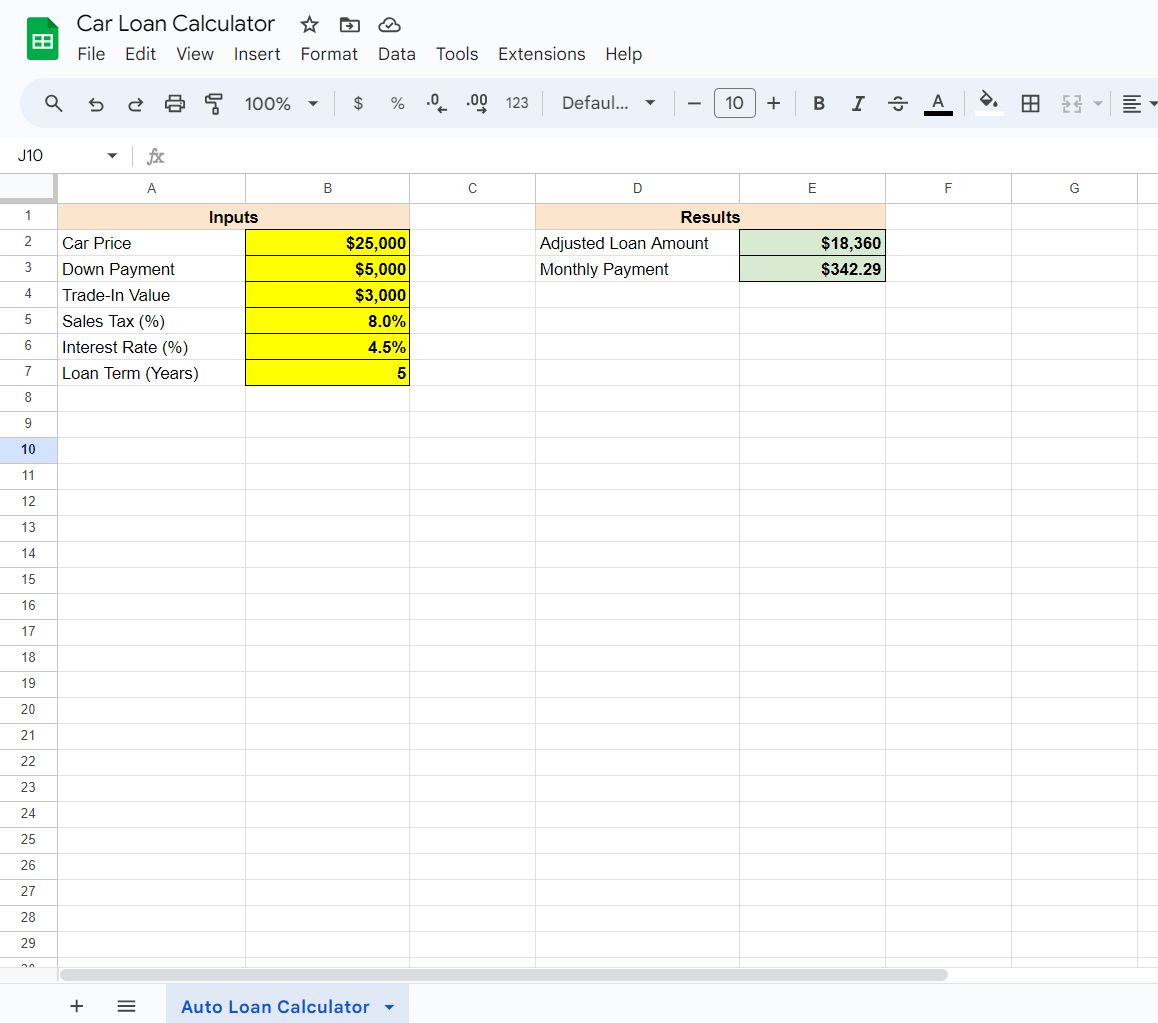
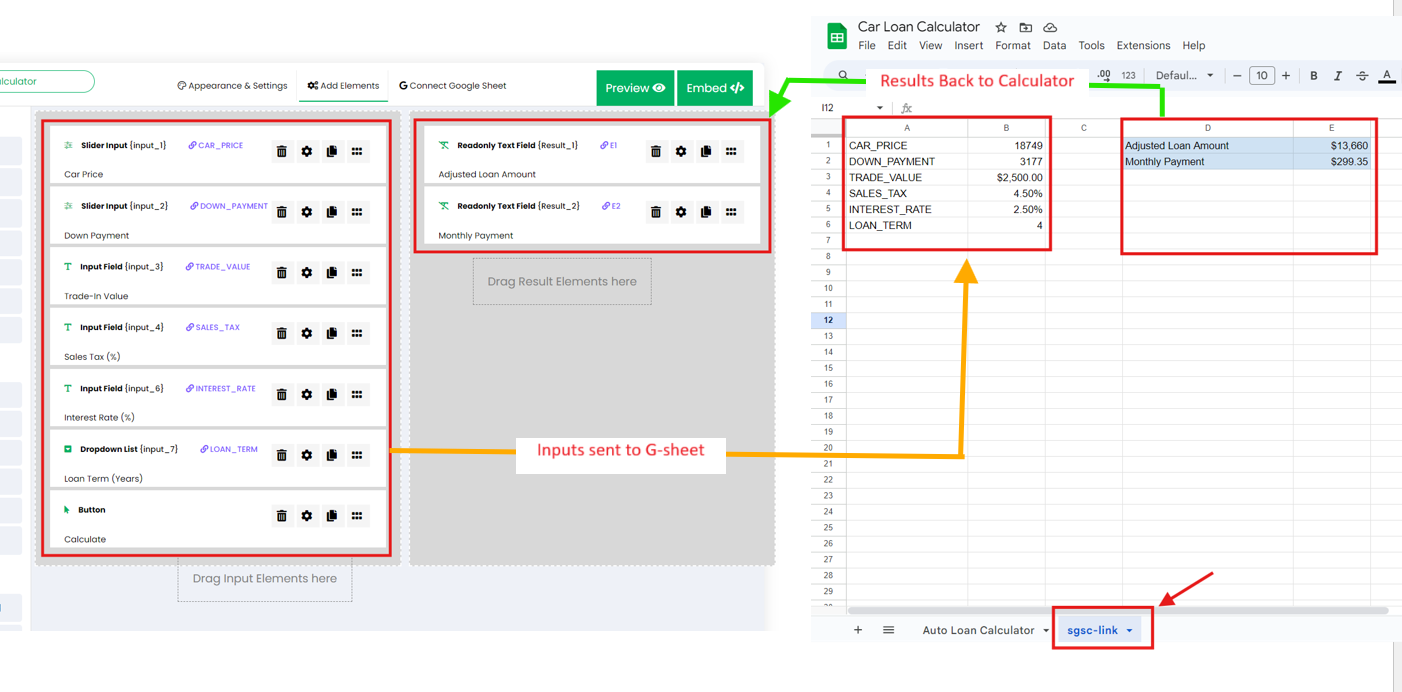
Open the provided Google Sheet template and review the layout. The sheet contains two main sections:
https://docs.google.com/spreadsheets/d/1M2pRfKBOJ7ldjz_JUvuBalyRRWlUwLs_W9I2I_uIydQ
- Inputs: User-provided values like Car Price, Down Payment, Trade-In Value, Sales Tax (%), Interest Rate (%), and Loan Term (Years).
- Results: Calculated values such as Adjusted Loan Amount and Monthly Payment, based on the inputs.
Step 2: Connect Your Google Sheet to the Calculator #
In the ES Builder dashboard, create a new calculator.
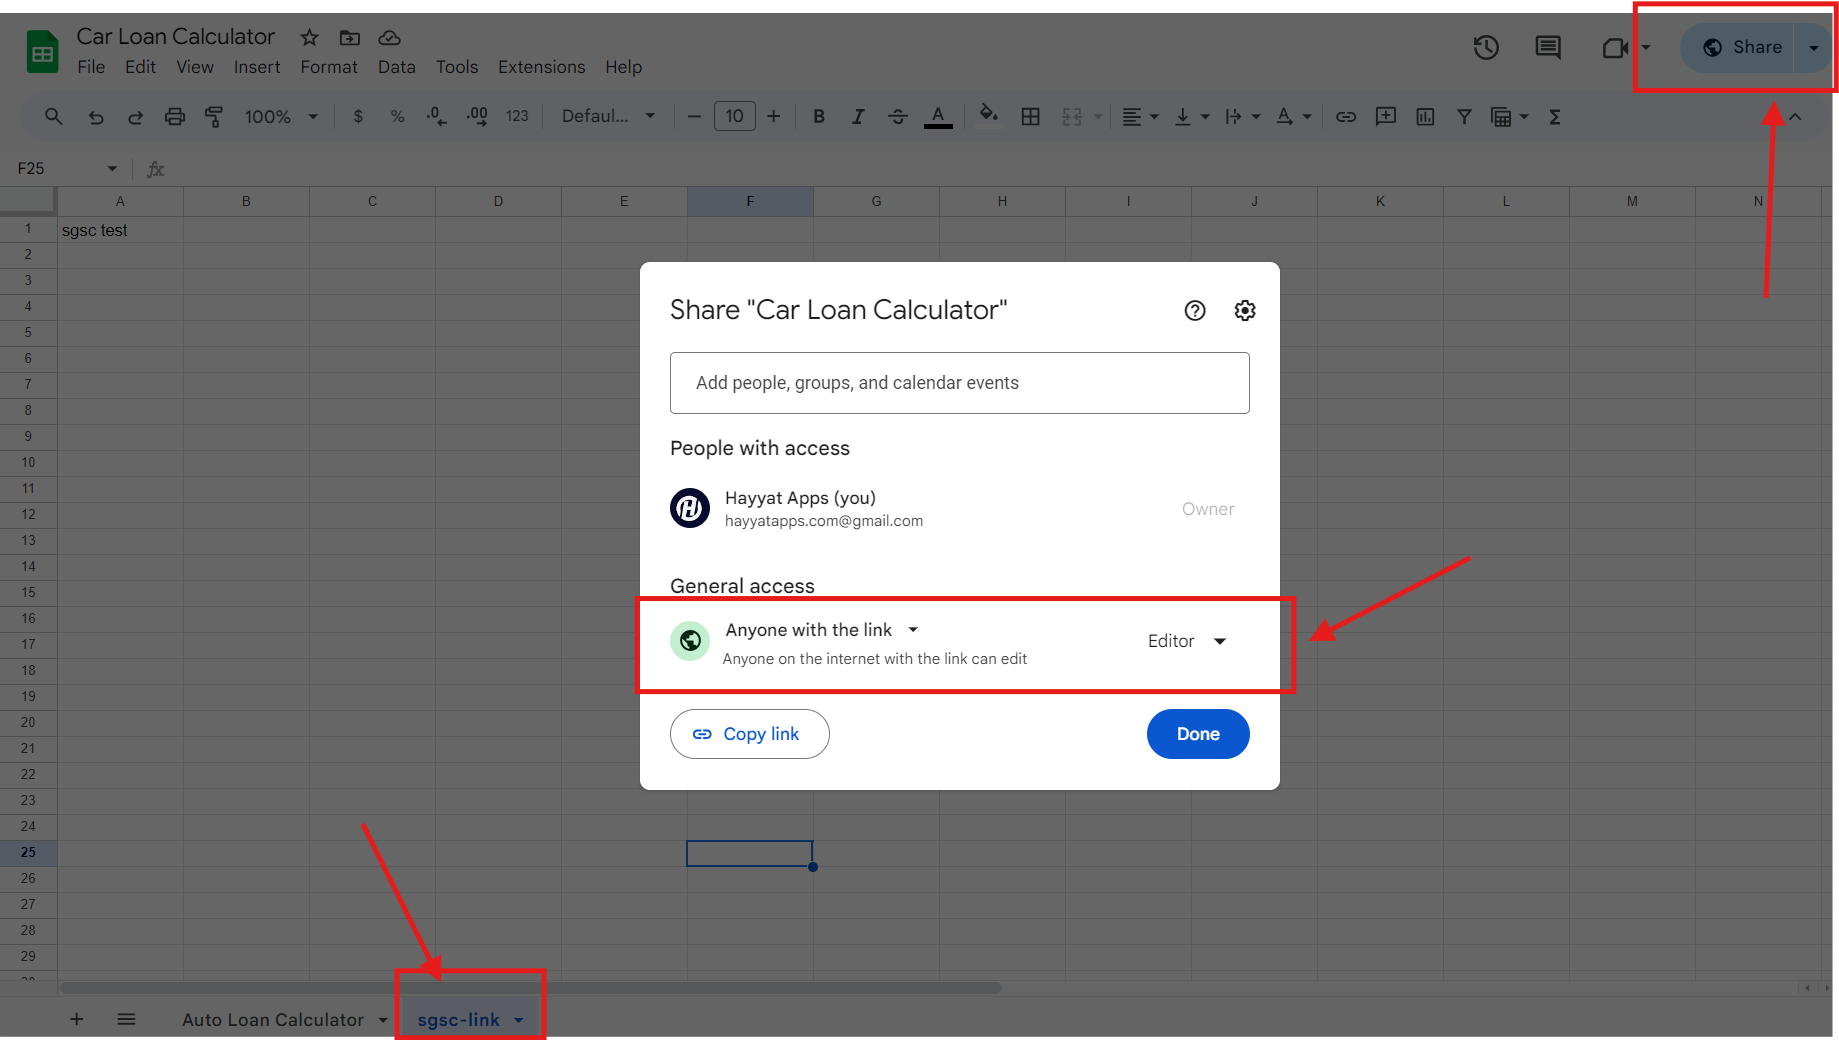
- Change the sharing settings of your Google Sheet to “Anyone with the link can edit” temporarily.
- Create a new tab in your Google Sheet named “sgsc-link”. The calculator will send user inputs to this tab in columns A:B and will read the output cells from this tab. You will need to link inputs and outputs from other tabs in the Google Sheet to this tab. Columns A:B are reserved for calculator inputs only—don’t put any results in these columns. You can put results in the C1:Z1000 range.
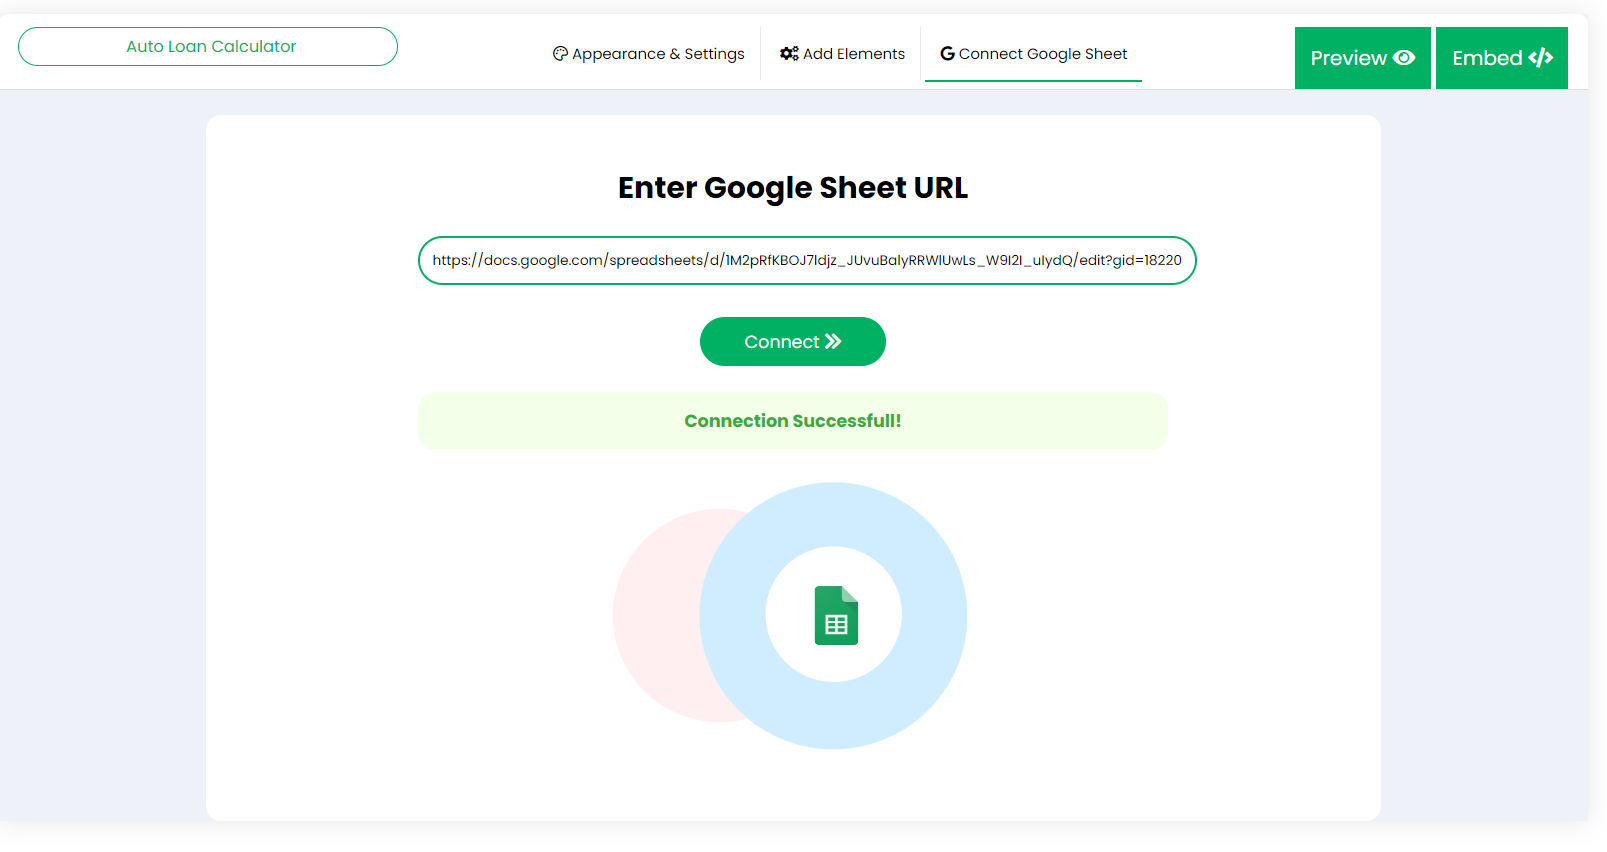
- Go to the calculator builder, click Connect Google Sheet, enter your Google Sheet URL, and click the “Connect” button.
- Keeping Google Sheet Private: Once the sheet is successfully connected to the calculator builder, you can revert the sheet’s sharing settings to private. To keep it private while still allowing the calculator to function, add the following ES Builder account as an editor in your Google Sheet:
embedsheets@googlegroups.com
Step 3: Design the Input Form #
In the calculator builder, navigate to the Add Elements tab.
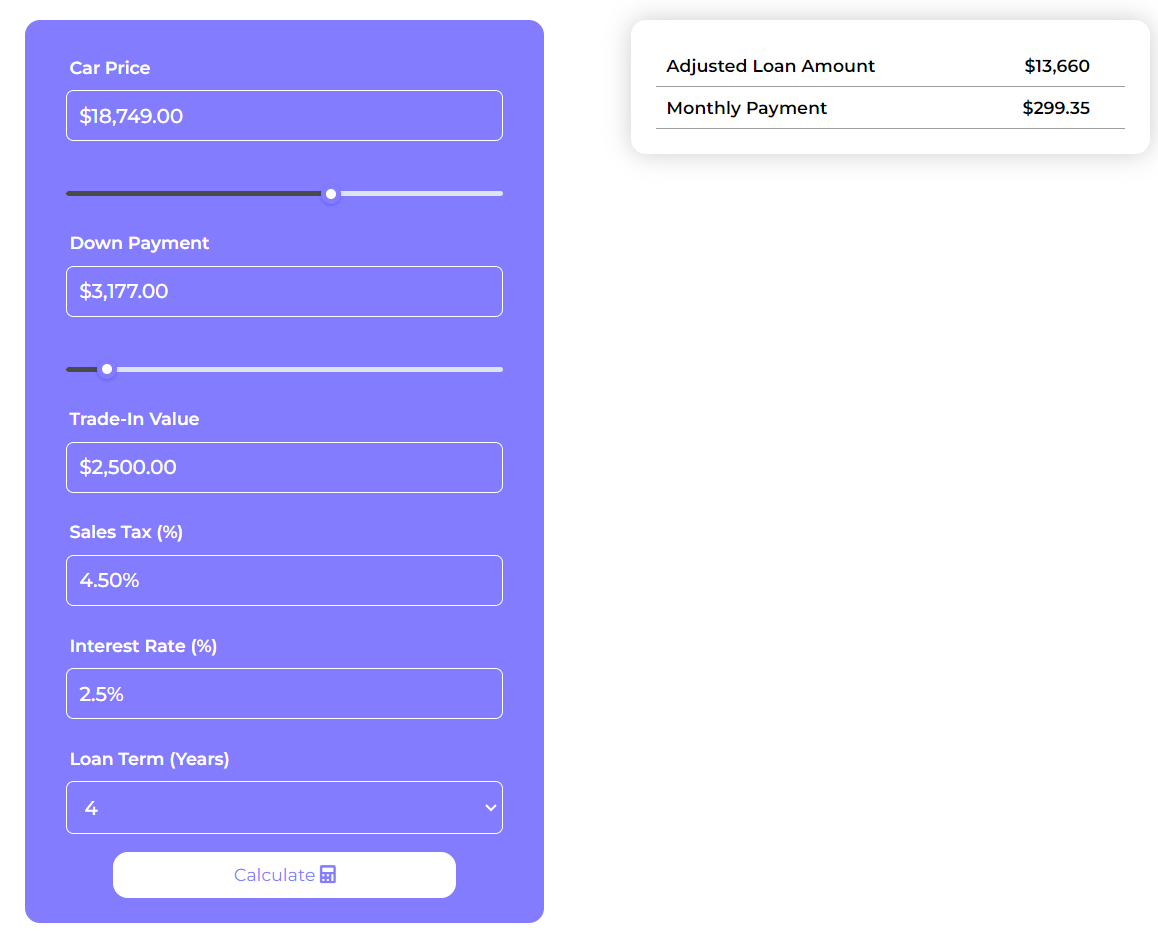
Drag and drop the input elements to match the fields in your Google Sheet. For this calculator, you will need:
- Slider Inputs for “Car Price” and “Down Payment” to allow users to adjust these values easily.
- Input Fields for “Trade-In Value”, “Sales Tax (%)” and “Interest Rate (%)” for precise entries.
- Dropdown Input for “Loan Term (Years)”. We will add options from 1 – 5 years.
- Calculate Button to trigger calculations.
By default, ES Builder sets input IDs like “input_1,” “input_2,” etc. You can rename these IDs to something more memorable (e.g., loan_amount, sales_tax) to make it easier to link them to other tabs in your Google Sheet.
Step 4: Configure Result Fields #
Now, move to the Results Section on the right side of the builder.
Drag and drop Readonly Text Field elements to display the calculated results:
- Readonly Text Field for “Adjusted Loan Amount” to show the calculated amount from the Google Sheet.
- Readonly Text Field for “Monthly Payment” to display the monthly payment based on the provided inputs.
Link these result fields to the appropriate cells in your Google Sheet to fetch the calculated values.
Unlike setting IDs for input elements, when specifying the “Input ID / G-Sheet Cell Address” for result elements, you must enter the exact cell address (e.g., “E1”, “F5”) so the calculator can read values from those cells.
Step 5: Appearance and Settings #
Go to the Appearance & Settings tab to adjust the number formatting (EU/US) for input fields, customize the calculator’s width, layout, and calculation trigger (e.g., auto-calculate on input change or calculate upon clicking a button) from the “Appearance & Settings” tab.
For a full list of all Appearance and Settings options, read more here: Setting Calculator Layout, Shadow, and Theme Colors.
Step 6: Preview and Publish Your Calculator #
Use the preview option to test your calculator. Adjust the input values using the sliders and fields to ensure the results update as expected.
Once satisfied with the setup, click Embed to generate the embed code.
Copy the provided embed code and paste it into an HTML code block on your website where you want the Car Loan Calculator to appear.
Adding a contact form to calculator #
You can enhance your calculator by adding a submission form, allowing users to send their loan applications directly to you. Simply add an “Email Form” from the “Universal Elements” section. You can customize the form to include fields like Name, Email, and Phone, depending on the information you wish to collect from users. Read more about the available options here.
Summary #
By following these steps, you can create a fully functional Car Loan Calculator using Google Sheets as the backend. Users can adjust the input values directly on your website, and the calculator will display up-to-date results based on calculations performed in the Google Sheet.
The above example is a simple one, designed to give you a clear understanding of how to connect inputs to the Google Sheet and display calculated results back on the calculator. However, you can also use more complex and data-heavy Google Sheets to build advanced calculators in a similar way. This method is especially useful for creating calculators that require intricate calculations or frequent updates to formulas, all managed directly within your Google Sheet.
